
Daikin Air Conditioner Control Panel Instructions: A Comprehensive Guide
Daikin systems offer sophisticated control‚ from simple on/off functions to advanced VRV management via Touch Manager‚ ensuring optimal comfort and efficiency․
Understanding Your Daikin Control Panel
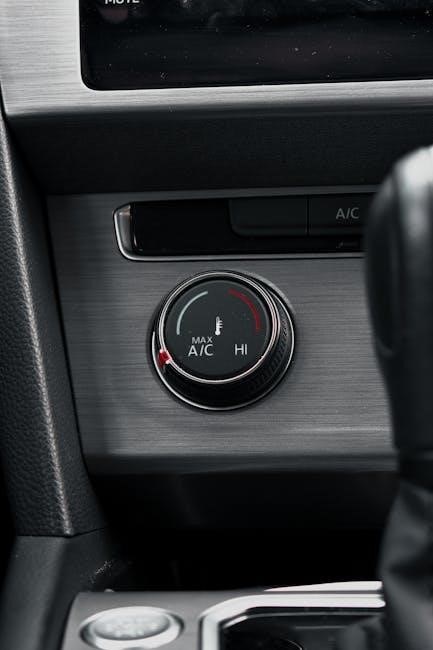
Daikin air conditioner control panels are the central interface for managing your indoor climate․ These panels‚ varying in complexity from basic infrared (IR) remotes to advanced Touch Manager systems for VRV setups‚ allow precise control over temperature‚ fan speed‚ and operational modes․ Familiarizing yourself with your specific panel is crucial for efficient operation․
Basic panels feature straightforward buttons for power‚ temperature adjustment‚ and mode selection․ More sophisticated systems offer timer functions‚ energy-saving features like Eco Mode‚ and detailed system monitoring․ Understanding the display indicators and button functions specific to your model‚ as outlined in the operation manual‚ will maximize your comfort and control․ Always refer to the manual for detailed instructions․
Types of Daikin Control Panels
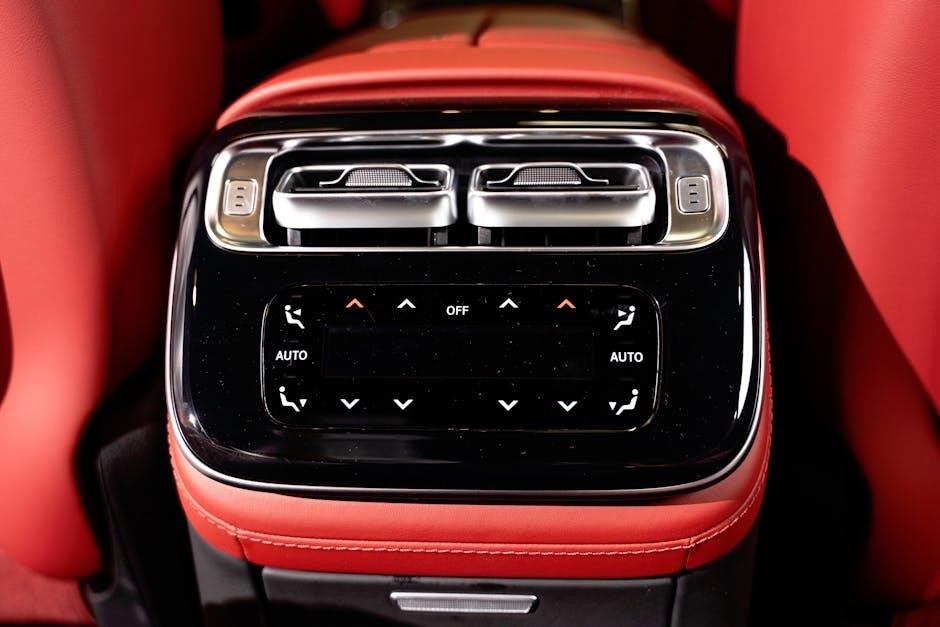
Daikin offers a range of control panels tailored to different system types․ Standard residential units typically utilize infrared (IR) remote controls‚ providing basic functionality like power‚ temperature‚ and mode adjustments․ More advanced residential and light commercial systems may include wall-mounted wired controllers for localized control․
For larger commercial applications‚ particularly those employing VRV (Variable Refrigerant Volume) systems‚ Daikin provides the sophisticated Touch Manager․ This centralized control system allows facility-wide management of air conditioning‚ lighting‚ and even fire alarm systems․ These systems integrate seamlessly‚ offering comprehensive control and monitoring capabilities․
Basic Operation: Powering On/Off
Daikin air conditioners are generally powered on and off using either the infrared (IR) remote control or a wall-mounted controller․ To initiate operation‚ simply press the designated “on/off” button on either device․ The unit will respond by activating its cooling or heating functions‚ depending on the previously selected mode․
To turn the unit off‚ press the same “on/off” button again․ Ensure the main power switch is also activated for initial startup․ Some models feature a safety mechanism; if conditions are unfavorable‚ safety devices may activate․ Refer to the operation manual for specific instructions related to your model․
Temperature Control
Daikin air conditioners allow precise temperature adjustments via the control panel or remote․ Set the desired temperature within the operational range specified in your unit’s manual․ Remember to record your preferred settings for consistent comfort․ Adjusting the temperature by 2-3°C higher during cooling can contribute to energy savings․
The system will automatically maintain the set temperature․ It’s crucial to understand operational limitations; the unit may temporarily adjust to achieve optimal performance․ Always refer to the operation manual for detailed guidance on temperature settings and potential variations based on environmental conditions․
Setting the Temperature
Daikin control panels feature intuitive temperature setting options․ Use the up and down arrows on the panel or remote to select your desired temperature․ The display will show the setpoint․ Ensure the chosen temperature falls within the unit’s operational range‚ as outlined in the manual․ Remember to consider personal comfort and energy-saving goals when making adjustments․
For optimal efficiency‚ record your preferred temperature․ Some models offer a “preferred temperature” memory function․ The system will then automatically maintain this setting․ Be aware that the unit may briefly adjust to reach and maintain the desired temperature‚ which is normal operation․
Temperature Range Limitations
Daikin air conditioners have specific operating temperature ranges for both cooling and heating modes․ Attempting to set a temperature outside this range may result in the unit not responding or displaying an error code․ Refer to your model’s operation manual for precise limitations‚ as they vary between systems․
Generally‚ cooling ranges fall between 60°F (16°C) and 90°F (32°C)‚ while heating ranges typically span 40°F (4°C) to 86°F (30°C)․ Setting a temperature 2-3°C higher during cooling can promote energy savings․ Always prioritize operating within the recommended range to ensure efficient performance and prevent potential damage to the unit․
Fan Speed Control
Daikin control panels allow precise adjustment of fan speed‚ influencing both comfort and energy consumption․ Typically‚ options include low‚ medium‚ high‚ and automatic settings․ Lower speeds minimize noise and reduce energy use‚ ideal for quiet environments or sleep․ Higher speeds maximize airflow for quicker temperature adjustments․
The automatic fan mode intelligently adjusts speed based on the difference between the set temperature and the room temperature‚ optimizing efficiency․ Selecting the lowest fan strength‚ coupled with a slightly higher temperature setting‚ activates a gy-saving mode‚ further reducing energy expenditure while maintaining a comfortable environment․
Adjusting Fan Speed Levels
Daikin air conditioner control panels generally feature dedicated buttons or touchscreen options for fan speed adjustment․ Pressing these controls cycles through available levels – typically low‚ medium‚ and high – indicated on the display․ Some models offer more granular control‚ with multiple intermediate speeds․ Observe the control panel display to confirm the selected level․
Experiment with different settings to find the optimal balance between airflow and noise․ Lower speeds are suitable for quiet operation‚ while higher speeds provide rapid cooling or heating․ Remember that automatic mode intelligently manages fan speed based on room conditions‚ offering a convenient‚ energy-efficient option․
Automatic Fan Mode
Daikin’s automatic fan mode optimizes airflow for comfort and energy savings․ When activated‚ the control panel directs the fan to adjust its speed based on the difference between the set temperature and the actual room temperature․ This eliminates the need for manual adjustments‚ providing consistent cooling or heating․
In automatic mode‚ the fan may operate at lower speeds when the desired temperature is nearly reached‚ reducing noise and power consumption․ It will increase speed as needed to maintain the setpoint․ Selecting this mode is often indicated by an “Auto” icon on the control panel display‚ offering a convenient‚ hands-free operation․
Mode Selection
Daikin control panels offer several modes to suit your needs․ Cooling Mode lowers the room temperature‚ while Heating Mode raises it․ Dry Mode‚ or dehumidification‚ reduces humidity without significant temperature change – ideal for damp conditions․
Auto Mode intelligently selects between cooling and heating to maintain your set temperature‚ offering convenience and efficiency․ The control panel typically displays the currently selected mode with a corresponding icon․ Switching between modes is usually achieved by pressing a dedicated “Mode” button‚ cycling through the available options until the desired setting appears․
Cooling Mode
Cooling Mode on your Daikin unit lowers the room temperature‚ providing relief during warm weather․ To activate‚ select the “Cool” mode on the control panel – often indicated by a snowflake icon․ Once engaged‚ set your desired temperature using the temperature adjustment buttons․ The unit will then operate to achieve and maintain that temperature․
Remember to ensure windows and doors are closed for optimal efficiency․ Some units offer features like “Powerful” cooling for rapid temperature reduction․ Setting the fan speed to “Auto” allows the unit to adjust airflow based on cooling demand‚ contributing to energy savings and consistent comfort․
Heating Mode
Heating Mode on your Daikin air conditioner warms the room when temperatures drop․ Activate this mode by selecting the “Heat” option on the control panel‚ typically represented by a flame icon․ After selection‚ use the temperature adjustment buttons to establish your preferred warmth level․ The unit will then initiate heating to reach and maintain the set temperature․
Ensure proper insulation and closed windows/doors for efficient heating․ Some models feature a “Powerful” heating function for quicker warming․ Utilizing “Auto” fan speed allows the unit to adjust airflow based on heating needs‚ optimizing both comfort and energy conservation․
Dry Mode (Dehumidification)
Dry Mode‚ or dehumidification‚ reduces humidity levels without significantly altering the room temperature․ Select this mode on the control panel – often indicated by a droplet icon – to activate․ This function is ideal for damp environments or when you desire a more comfortable‚ less sticky atmosphere․ The unit operates at a lower fan speed during dry mode to maximize moisture removal․
While in dry mode‚ the compressor cycles on and off to extract moisture․ Expect a slower cooling effect compared to cooling mode․ Regularly emptying the condensate drain is crucial for optimal performance․ This mode is energy-efficient for humidity control․
Auto Mode
Auto Mode intelligently adjusts cooling and heating operations based on the current room temperature․ Upon selection via the control panel‚ the system automatically determines whether to cool or heat to reach your set temperature․ This mode offers convenient‚ hands-free climate control‚ eliminating the need for manual adjustments between cooling and heating․
The unit continuously monitors the room temperature and adjusts accordingly․ It’s an energy-efficient option‚ as it only activates the necessary functions․ Some Daikin units in Auto Mode also incorporate fan speed adjustments for optimal comfort and energy savings․ Refer to your specific model’s manual for details․
Airflow Direction Control
Daikin air conditioners offer precise airflow direction control‚ enhancing comfort by distributing air evenly throughout the room․ Using the control panel‚ you can adjust both vertical and horizontal airflow to suit your preferences․ This feature allows you to direct air away from sensitive areas or focus it where it’s needed most․
The control panel typically includes dedicated buttons for adjusting airflow․ Some models feature an “Airflow Direction” button‚ while others utilize up/down and left/right arrows․ Experiment with different settings to find the optimal configuration for your space․ Refer to your unit’s manual for specific instructions and available options․
Vertical Airflow Adjustment
Vertical airflow adjustment on your Daikin unit allows you to direct air upwards or downwards․ This is typically controlled via a dedicated button on the control panel‚ often labeled with up and down arrows‚ or within the “Airflow Direction” settings․ Pressing these buttons will cycle through various louver positions․
You can select from a range of angles‚ from fully open for maximum downward airflow to fully closed to redirect air towards the ceiling for gentle circulation․ Some models offer an “auto-swing” function‚ which automatically oscillates the louvers for wider distribution; Adjusting vertical airflow helps prevent drafts and ensures consistent temperature throughout the room․
Horizontal Airflow Adjustment
Horizontal airflow adjustment lets you control the left-to-right direction of the air․ Typically‚ a button on the control panel‚ often part of the “Airflow Direction” controls‚ manages this feature․ Pressing this button will move the louvers horizontally‚ allowing you to distribute air across a wider area or focus it on specific zones․
Like vertical adjustment‚ some Daikin units include an auto-swing function for horizontal airflow‚ providing even distribution․ Proper horizontal adjustment prevents cold spots and ensures comfortable temperatures throughout the room․ Refer to your operation manual for specific button locations and available settings for your model․
Timer Functions
Daikin air conditioners offer versatile timer functions for convenient operation․ You can typically set a timer to initiate operation at a future time‚ ensuring the room is comfortable when you arrive․ Conversely‚ a shutdown timer allows you to pre-set the unit to turn off automatically‚ saving energy and preventing overnight cooling or heating․
These timers are usually programmed directly through the control panel‚ often involving setting the desired time and selecting either “On” or “Off” timer mode․ Some models feature multiple timer settings for greater flexibility․ Consult your specific model’s operation manual for detailed instructions․
Setting a Timer for Operation
To schedule your Daikin air conditioner to start automatically‚ access the timer settings on the control panel․ Typically‚ you’ll press a “Timer” or “On” button‚ then use the arrow keys to set the desired start time․ Ensure the current time is correctly displayed before setting the timer; After inputting the time‚ confirm your selection – often with an “Enter” or “Set” button․
The unit will then remember this setting and automatically power on and begin operating at the programmed time‚ using your previously selected mode and temperature․ Refer to your specific model’s manual for precise button locations and procedures․
Setting a Timer for Shutdown

Utilizing the shutdown timer function on your Daikin air conditioner allows for automatic turn-off‚ conserving energy and ensuring comfort without manual intervention․ Locate the “Timer” or “Off” button on the control panel․ Use the arrow keys to specify the desired shutdown time․ Confirm the current time is accurate before programming the timer․
Once the time is set‚ confirm your selection with an “Enter” or “Set” button․ The unit will then automatically power off at the designated time‚ returning to standby mode․ Consult your model’s operation manual for specific instructions and button layouts․
Energy Saving Features
Daikin air conditioners incorporate several features designed to minimize energy consumption while maintaining optimal comfort․ Eco Mode operation intelligently adjusts settings to reduce power usage‚ often raising the temperature slightly during cooling․ Gy-Saving Mode‚ activated by setting the fan to its lowest speed‚ further reduces energy expenditure‚ ideal for sleep or when away;
These modes work by optimizing compressor operation and fan speed‚ delivering substantial savings․ Remember to record your preferred settings for quick access․ Utilizing these features contributes to a smaller carbon footprint and lower energy bills․
Eco Mode Operation
Eco Mode on your Daikin air conditioner intelligently manages cooling or heating cycles to maximize energy efficiency․ This function subtly adjusts the set temperature‚ typically increasing it by 2-3°C during cooling‚ without significantly impacting perceived comfort․ The system optimizes compressor operation and fan speed to minimize power consumption․
Activating Eco Mode allows the unit to operate more efficiently‚ reducing energy bills and environmental impact․ It’s a convenient setting for daily use‚ providing a balance between comfort and savings․ The control panel display will indicate when Eco Mode is active․
Gy-Saving Mode Details
Gy-Saving Mode‚ also known as energy-saving mode‚ is designed for prolonged operation with minimal energy use․ Setting the fan to its lowest speed while in this mode allows the Daikin unit to maintain a comfortable temperature while significantly reducing power consumption․ This is particularly useful when you are away from home or during sleep․
To engage this feature‚ simply select the lowest fan setting and the desired temperature․ The unit will then operate efficiently‚ minimizing energy waste․ Utilizing the “ME LEAVE” button (if equipped) streamlines activation‚ eliminating complex procedures for energy conservation․
Remote Control Features
Daikin remote controls provide convenient access to all air conditioner functions․ Key buttons include power on/off‚ temperature adjustment‚ and fan speed control․ The display indicators clearly show the current settings‚ including mode (cooling‚ heating‚ dry‚ auto)‚ temperature‚ and fan speed․
Understanding button functions is crucial for optimal use․ Refer to your specific model’s manual for detailed explanations․ The remote allows for precise control of airflow direction and timer settings․ For VRV systems‚ advanced features are accessible through the Touch Manager interface‚ extending control beyond basic operation․
Remote Control Button Functions
Daikin remote controls feature dedicated buttons for power‚ mode selection (cool‚ heat‚ dry‚ auto)‚ temperature up/down‚ and fan speed adjustment․ The “on/off” button initiates or terminates operation․ Mode buttons cycle through available settings․ Temperature buttons adjust the desired room temperature․ Fan speed buttons control airflow intensity‚ often including an automatic setting․
Additional buttons may include a timer function‚ airflow direction control‚ and potentially an “eco mode” or “gy-saving mode” button․ Refer to your specific model’s operation manual for a detailed explanation of each button’s function and any unique features it offers․
Remote Control Display Indicators
Daikin remote control displays provide crucial operational information․ Common indicators include the current set temperature‚ operating mode (cooling‚ heating‚ dry‚ auto)‚ and fan speed level․ Symbols often represent specific functions‚ such as timer activation or eco mode engagement․ Error codes may appear to signal system malfunctions‚ requiring troubleshooting or professional service․
The display also typically shows the status of airflow direction and whether the unit is actively cooling or heating․ Understanding these indicators allows users to monitor system performance and adjust settings effectively․ Consult your model’s manual for a complete interpretation of all displayed symbols and codes․
Troubleshooting Common Issues
Daikin air conditioner control panels can sometimes present issues․ If the unit fails to power on‚ check the main power switch and circuit breaker․ Error codes displayed on the panel indicate specific problems; consult your operation manual for their meanings․ Normal operation may include sounds like fan adjustments or compressor cycles․
If issues persist‚ restarting the unit or resetting the control panel might resolve minor glitches․ For more complex problems‚ like consistent error codes or performance decline‚ contacting a qualified Daikin dealer is recommended․ Always prioritize safety and avoid attempting repairs yourself․

Unit Not Turning On
If your Daikin air conditioner isn’t responding‚ begin by verifying the power supply․ Ensure the main power switch is activated‚ as detailed in the operation manual’s “What to do before operation” section․ Check the circuit breaker for any tripped switches and reset if necessary․ Press the on/off button firmly – sometimes a second press is required‚ as indicated in some manuals (refer to figure 4)․
If the problem continues‚ consult the manual for specific troubleshooting steps․ Contacting a Daikin dealer is crucial if basic checks fail‚ as internal issues may require professional attention․
Error Codes and Their Meanings
Daikin air conditioners utilize error codes to signal malfunctions․ While specific codes vary by model‚ the operation manual is your primary resource for decoding them․ These codes indicate issues ranging from sensor failures to refrigerant leaks or compressor problems․ Ignoring error codes can lead to further damage and reduced efficiency․
Refer to your unit’s manual for a comprehensive list and corresponding solutions․ If you encounter an unfamiliar code‚ immediately contact a qualified Daikin dealer for diagnosis and repair․ Attempting self-repair without proper knowledge is strongly discouraged․
Advanced Features (VRV Systems)
Daikin’s Variable Refrigerant Volume (VRV) systems offer sophisticated control through the Touch Manager․ This interface allows centralized management of multiple indoor units‚ optimizing energy usage and comfort across an entire facility․ Touch Manager provides detailed monitoring‚ scheduling‚ and reporting capabilities․
Furthermore‚ VRV systems can integrate with broader facility management systems‚ enabling seamless control of air conditioning alongside lighting and fire alarms․ Daikin leverages its technology to deliver solutions tailored to complex building needs‚ enhancing operational efficiency and occupant well-being;
Touch Manager Overview
Touch Manager serves as the central control point for Daikin VRV systems‚ offering an intuitive interface for managing air conditioning equipment․ It’s not merely for temperature adjustments; the software delivers sophisticated facility control‚ integrating with lighting and fire alarm systems across single or multiple buildings․
Users can monitor system performance‚ create customized schedules‚ and generate detailed reports․ This centralized approach optimizes energy consumption and ensures consistent comfort․ Touch Manager simplifies complex operations‚ providing a user-friendly experience for building managers and technicians alike‚ enhancing overall system efficiency․
Facility Management Integration
Daikin’s control systems seamlessly integrate with broader facility management platforms‚ extending beyond simple air conditioning control․ This integration allows for unified management of HVAC‚ lighting‚ and fire alarm systems within a building or across multiple sites․ Leveraging Daikin’s experience and technology‚ these solutions meet diverse demands․
Centralized control streamlines operations‚ improves energy efficiency‚ and enhances building security․ Data from the VRV systems‚ managed through Touch Manager‚ can be shared with building management systems (BMS) for comprehensive monitoring and reporting‚ optimizing overall facility performance and reducing operational costs․
Safety Precautions
Before operation‚ always review the unit’s manual and ensure the main power switch is correctly positioned․ Daikin air conditioners incorporate safety devices designed to protect the unit and occupants; understanding their function is crucial․ Normal operation may involve automatic safety device activation under specific conditions․
Regularly check for any unusual noises or smells‚ and immediately discontinue use if detected․ Do not attempt to repair the unit yourself; instead‚ contact your Daikin dealer for assistance․ Prioritize safety by adhering to all guidelines and warnings outlined in the operation manual to prevent potential hazards․
Before Operation Checklist
Prior to activating your Daikin air conditioner‚ confirm the air filter is clean to ensure optimal airflow and efficiency․ Verify that all access panels are securely fastened‚ preventing accidental contact with moving parts․ Inspect the surrounding area for any obstructions that might impede airflow to or from the unit․
Ensure the main power switch is in the ‘on’ position‚ as detailed in the operation manual․ Review the manual’s “What to do before operation” chapter for specific model instructions․ Finally‚ confirm the desired settings are selected on the control panel before initiating operation for comfortable and safe use․
Safety Device Operation
Daikin air conditioners incorporate safety devices to protect the unit and ensure user well-being․ Under certain operating conditions‚ these devices may activate‚ resulting in temporary shutdown or altered performance – this is normal․ These safeguards respond to issues like overheating or unusual electrical activity․
If a safety device triggers‚ the unit might not respond to control panel commands․ Consult your operation manual to understand potential causes and recommended actions․ For persistent issues or error codes‚ immediately contact your local Daikin dealer for professional assistance and avoid attempting self-repair․
Maintenance and Cleaning
Regular maintenance ensures optimal performance and longevity of your Daikin air conditioner․ Begin by gently cleaning the control panel with a soft‚ dry cloth to remove dust and debris․ Avoid using liquids or abrasive cleaners‚ which could damage the surface․
Crucially‚ prioritize filter maintenance; clean or replace filters as recommended in your operation manual․ A clogged filter restricts airflow‚ reducing efficiency and potentially activating safety devices․ Consistent cleaning contributes to improved air quality and prevents unnecessary strain on the system‚ saving energy and costs․
Control Panel Cleaning
Maintaining a clean control panel is essential for clear visibility and proper operation of your Daikin air conditioner․ Always power off the unit before cleaning․ Use a soft‚ dry cloth to gently wipe away dust and smudges from the panel’s surface․

Avoid applying liquids directly to the control panel‚ as this could cause damage to the electronic components․ For stubborn marks‚ lightly dampen the cloth with water and immediately dry the surface․ Regular cleaning prevents buildup and ensures responsive button functionality‚ contributing to a seamless user experience․
Filter Maintenance
Regular filter maintenance is crucial for optimal Daikin air conditioner performance and air quality․ Check the filters at least monthly‚ and clean or replace them as needed․ A clogged filter restricts airflow‚ reducing cooling efficiency and potentially causing the unit to work harder․
Refer to your unit’s operation manual for specific filter removal and cleaning instructions․ Most filters can be vacuumed or washed with mild detergent and water‚ ensuring they are completely dry before reinstallation․ Replacing filters annually is generally recommended‚ especially during peak usage seasons․
Contacting Daikin Support
If you encounter persistent issues with your Daikin air conditioner control panel‚ reaching out to Daikin support is recommended․ Begin by locating your local Daikin dealer through the official Daikin website; they can provide specialized assistance and schedule service appointments․
Extensive online support resources‚ including FAQs‚ troubleshooting guides‚ and downloadable manuals‚ are also available on the Daikin website․ For complex problems or error codes‚ contacting a qualified technician is crucial․ Don’t hesitate to seek professional help to ensure safe and effective operation․
Finding Your Local Dealer
To locate an authorized Daikin dealer near you for assistance with your air conditioner control panel‚ the official Daikin website provides a convenient dealer locator tool․ This resource allows you to search by zip code or city to find qualified professionals in your area․
Daikin dealers are trained to handle a wide range of issues‚ from basic troubleshooting to complex repairs and installations․ They can offer expert advice on control panel operation‚ energy-saving features‚ and maintenance best practices․ Contacting a local dealer ensures you receive specialized support tailored to your specific Daikin system․
Online Support Resources
Daikin offers a wealth of online support resources to assist you with your air conditioner control panel․ The official Daikin website features a comprehensive library of operation manuals‚ troubleshooting guides‚ and frequently asked questions (FAQs)․ These resources cover a wide range of models and control panel types․
You can also find helpful videos and tutorials demonstrating various control panel functions and features․ Daikin’s online support portal allows you to submit inquiries and connect with customer support representatives for personalized assistance․ Utilizing these resources can often resolve common issues quickly and efficiently․