Honeywell Thermostat TH5220D1029 Installation Manual: A Comprehensive Plan
This detailed manual unlocks the full potential of your Honeywell TH5220D1029, guiding you through installation, programming, and troubleshooting for optimal comfort and efficiency.
Welcome! This manual serves as your comprehensive guide to installing and operating the Honeywell TH5220D1029 thermostat. Designed for ease of use and efficient climate control, this thermostat offers a reliable solution for managing your home’s heating and cooling systems. Whether you’re a seasoned DIY enthusiast or a first-time installer, this document provides step-by-step instructions and valuable insights.
The TH5220D1029 is engineered to enhance your comfort while potentially reducing energy consumption. It’s a programmable thermostat, allowing you to create customized schedules tailored to your lifestyle. This introduction will prepare you for a smooth installation process and unlock the full range of features available with your new Honeywell thermostat, fostering creativity and innovation in home comfort management.
Package Contents & Verification
Before beginning installation, carefully verify the contents of your Honeywell TH5220D1029 package. You should find the thermostat unit itself, a mounting backplate for wall attachment, and installation screws with wall anchors for secure placement. A detailed installation manual (this document!) is also included, alongside wire labels to aid in proper wiring identification.
Inspect all components for any signs of damage during shipping. If any parts are missing or appear damaged, do not proceed with installation. Contact Honeywell Support immediately (see contact information at the end of this manual) to request replacements. Proper verification ensures a smooth and successful installation process, maximizing the benefits of your new thermostat.
Safety Precautions
Prioritize safety during the installation of your Honeywell TH5220D1029 thermostat. Always disconnect power to your heating and cooling system at the breaker box before beginning any wiring work. Failure to do so could result in electrical shock or damage to your equipment. If you are uncomfortable working with electrical wiring, consult a qualified HVAC technician;
Wear appropriate safety glasses to protect your eyes. Be mindful of potential hazards like sharp wires and edges. This thermostat is designed for indoor use only; do not expose it to moisture or extreme temperatures. Incorrect installation can lead to system malfunction or safety hazards – follow all instructions carefully.
Tools Required for Installation
Proper tools ensure a smooth and safe Honeywell TH5220D1029 installation. You will need a Phillips head screwdriver for mounting the backplate and connecting wires. A small flathead screwdriver may be useful for terminal connections. Wire strippers are essential for preparing the existing thermostat wires for secure attachment.
A level is crucial for ensuring the thermostat is mounted straight, improving its appearance and functionality. A pencil is helpful for marking screw locations. Consider having a digital multimeter available to verify power is off before working with wiring. Having these tools readily available will streamline the process and minimize frustration during installation.
Understanding the Thermostat Display & Buttons
The Honeywell TH5220D1029 features a user-friendly interface. The display clearly shows the current temperature, setpoint, and operating mode (Heat, Cool, Auto, Off). Several icons communicate system status, like fan operation or low battery warnings. Familiarizing yourself with these indicators is key to efficient operation.
The thermostat utilizes intuitive buttons for control. Up and Down arrows adjust the temperature setpoint. The ‘Mode’ button cycles through heating, cooling, and auto settings. A ‘Fan’ button controls fan operation (Auto, On). Understanding each button’s function allows for easy programming and adjustments to your comfort preferences.
Display Icons and Their Meanings
Several icons on the Honeywell TH5220D1029 display provide crucial system information. A flame icon indicates the heating system is actively running, while a snowflake signifies cooling is in progress. The ‘Fan’ icon shows whether the fan is set to ‘Auto’ or ‘On’. A battery icon alerts you to low battery levels, requiring replacement.
Other important icons include those for system mode (Heat, Cool, Auto, Off) and Wi-Fi connectivity (if applicable). A flashing icon often indicates a system issue or a setting that needs attention. Refer to the troubleshooting section of this manual for detailed explanations of specific error indicators and their resolutions.
Button Functions Explained
The Honeywell TH5220D1029 features intuitive button controls for easy operation. The ‘Menu’ button accesses the thermostat’s settings, allowing adjustments to schedules, temperature preferences, and system configurations. ‘Up’ and ‘Down’ arrows modify temperature setpoints and navigate through menu options.
The ‘Hold’ button temporarily overrides programmed schedules, maintaining a constant temperature. The ‘Fan’ button controls fan operation, switching between ‘Auto’ and ‘On’ modes. Understanding these functions is key to customizing your comfort. Refer to the programming section for detailed instructions on utilizing these buttons to create personalized heating and cooling schedules.
System Compatibility Check
Before installation, verifying system compatibility is crucial for proper functionality. The Honeywell TH5220D1029 supports most 24V heating and cooling systems, including gas, oil, and electric furnaces. However, it’s incompatible with line voltage (120V/240V) systems.
Confirm your system uses standard wiring configurations – Rh, Rc, W, Y, G, and C. Absence of a ‘C’ wire (common wire) may require a C-wire adapter kit. Carefully review your existing thermostat’s wiring and compare it to the diagrams provided in this manual. Incorrect wiring can damage the thermostat or your HVAC system.
Wiring Diagram Overview
Understanding the wiring diagram is essential for a successful installation. The TH5220D1029 utilizes a standard color-coded wiring system. Rh and Rc terminals connect to the heating power supply, while W controls heating activation. Y activates cooling, G manages the fan, and C provides the common 24V return.
Carefully examine your existing wiring before disconnecting anything. Take a picture for reference! The diagram illustrates typical configurations for gas, oil, and electric systems. Incorrect connections can lead to system malfunction or damage. If unsure, consult a qualified HVAC technician. Always power off the HVAC system at the breaker before proceeding.

Identifying Existing Wiring
Before disconnecting wires from your old thermostat, meticulous identification is crucial. Carefully label each wire with the corresponding terminal designation – Rh, Rc, W, Y, G, and C. Note the wire colors; however, rely on the terminal labels, as colors can vary.
If wires are not labeled, document their positions before removal. A photograph is highly recommended! Pay close attention to any jumper wires connecting Rh and Rc. These jumpers are vital for proper operation in some systems. Disconnect one wire at a time to avoid confusion. If you encounter unfamiliar wiring, consult a professional HVAC technician for assistance.
Common Wiring Configurations (Gas, Oil, Electric)
Gas systems typically utilize Rh, Rc, W, Y, and G wires. ‘W’ activates heating, ‘Y’ cooling, and ‘G’ the fan. Oil systems often include an additional wire for the oil primary relay. Electric systems may use Rh, Rc, W, Y, G, and often require a ‘C’ wire for consistent power.
The ‘C’ wire is crucial for the TH5220D1029’s functionality. If absent, a C-wire adapter might be necessary. Heat pump systems have more complex wiring, potentially including a reversing valve wire (O/B). Always refer to your system’s specific wiring diagram. Incorrect wiring can damage your HVAC equipment.
Step-by-Step Installation Guide
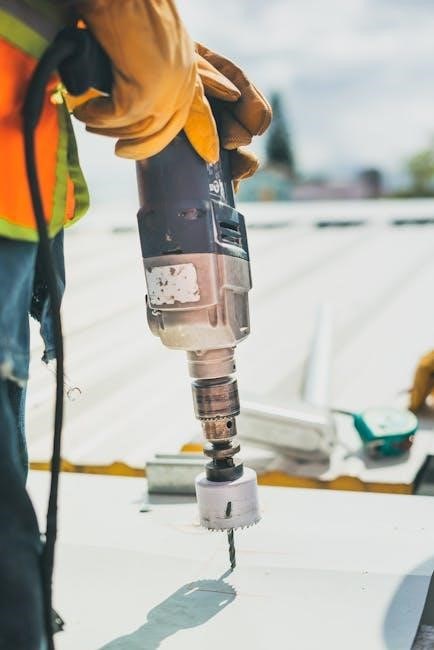
Begin by turning off power to your HVAC system at the breaker. Carefully remove your old thermostat, noting the wire connections – photographing them is highly recommended! Mount the TH5220D1029 backplate securely to the wall, ensuring it’s level.
Connect the wires to the corresponding terminals on the new backplate, referencing your wiring diagram and the photos you took. Double-check each connection for firmness. Once all wires are connected, gently push any excess wire back into the wall. Finally, attach the thermostat body to the backplate.
Removing the Old Thermostat
Before starting, switch off power to your HVAC system at the circuit breaker! Gently remove the cover of your existing thermostat, often by snapping it off or loosening a screw. Carefully disconnect the wires, one at a time, and immediately label each wire with the corresponding terminal letter.
A photograph of the wiring before disconnection is invaluable. Unscrew the old thermostat’s baseplate from the wall. Be mindful of any wall anchors or damage. Clean the wall surface before installing the new backplate, ensuring a secure mounting location.
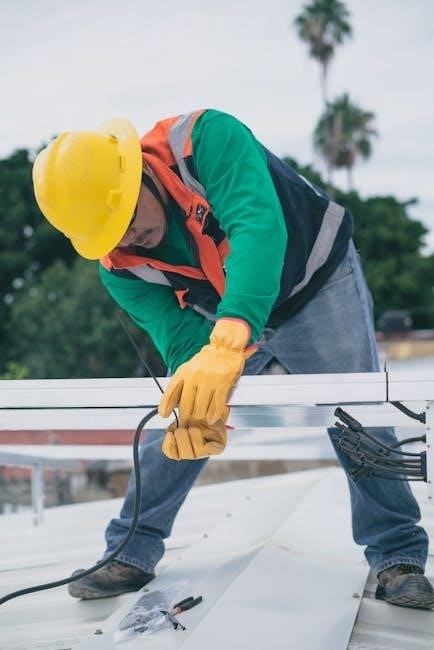
Mounting the Backplate
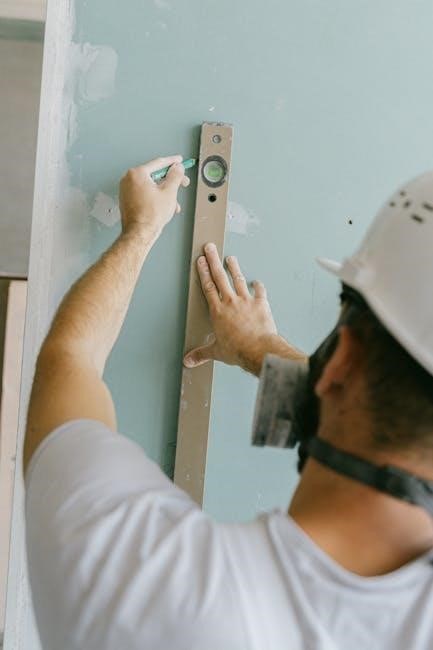
Position the Honeywell TH5220D1029 backplate on the wall, ensuring it’s level using a spirit level. Mark the screw holes with a pencil. If necessary, drill pilot holes for the provided wall anchors, especially if mounting on drywall.
Insert the wall anchors into the drilled holes. Align the backplate with the anchors and secure it using the provided screws. Do not overtighten! Ensure the backplate is firmly attached to the wall and doesn’t wobble. A secure backplate is crucial for proper thermostat operation and wire connections.

Connecting the Wires
Carefully connect the wires to the corresponding terminals on the Honeywell TH5220D1029 backplate. Refer to the wiring diagram and your existing thermostat’s wiring labels. Gently push each wire firmly into its designated terminal until it clicks into place.

Double-check all connections to ensure they are secure and correctly matched. Loose or incorrect wiring can cause system malfunctions. If you encounter difficulty, consult a qualified HVAC technician. Once all wires are connected, gently tuck any excess wire back into the wall opening, avoiding pinching or damage.
Powering On & Initial Setup
After securely connecting the wires, restore power to your HVAC system at the breaker. The Honeywell TH5220D1029 should power on automatically. The display will illuminate, initiating the initial setup process. You’ll likely be prompted to select your system type – furnace, heat pump, or electric baseboard.
Follow the on-screen instructions to configure basic settings like language preference and date/time. The thermostat may also guide you through a system test to verify proper operation of heating and cooling functions. Confirm these settings before proceeding to programming your desired temperature schedules.
Programming the Thermostat
The Honeywell TH5220D1029 allows for customized heating and cooling schedules to maximize comfort and energy savings. Access the programming mode via the menu button. You can create different schedules for weekdays and weekends, or even individual days. Define “wake,” “leave,” “return,” and “sleep” periods, setting desired temperatures for each.
The thermostat supports multiple programming modes, including a temporary hold function for overriding the schedule. Explore options for optimizing energy use based on your lifestyle. Regularly review and adjust your schedule to ensure it aligns with your needs and preferences for consistent comfort.
Setting the Date and Time
Accurate date and time settings are crucial for proper scheduling functionality. To set the date and time on your Honeywell TH5220D1029, navigate to the “Settings” menu using the thermostat’s buttons. Select the “Date” and “Time” options, then use the up and down arrows to adjust the values. Confirm each selection by pressing the “OK” or “Select” button.
Ensure the correct time zone is selected for accurate operation. Incorrect date or time settings can lead to scheduling errors and inconsistent temperature control. Double-check your settings after initial setup and after any power outages to maintain optimal performance.
Creating a Heating/Cooling Schedule
The Honeywell TH5220D1029 allows for customized heating and cooling schedules to maximize comfort and energy savings. Access the “Schedule” menu through the thermostat’s interface. You can typically define different periods – such as “Wake,” “Leave,” “Return,” and “Sleep” – with unique temperature settings for each day of the week.
Utilize the up/down arrows to set desired temperatures for each period. Consider your daily routine when programming the schedule; lower temperatures while away and during sleep to conserve energy. Review and adjust the schedule periodically to optimize comfort and efficiency based on seasonal changes or lifestyle adjustments.
Wi-Fi Connectivity (If Applicable)
Certain Honeywell TH5220D1029 models offer Wi-Fi connectivity, enabling remote control and monitoring via the Honeywell Home app. To connect, download the app and create an account. Follow the in-app instructions to pair your thermostat with your home’s Wi-Fi network – ensure a stable 2.4 GHz connection is available.
Once connected, you can adjust temperatures, view energy usage reports, and receive alerts from anywhere with an internet connection. Explore the app’s features for advanced control, including geofencing and smart home integration. Regularly check for app and thermostat firmware updates to maintain optimal performance and security.
Troubleshooting Common Issues
Thermostat Not Powering On: Verify the circuit breaker hasn’t tripped. Check wiring connections at the thermostat and furnace/boiler, ensuring they are secure. If using batteries, replace them with fresh ones. A faulty C-wire (common wire) is a frequent cause; confirm its presence and proper connection.
Incorrect Temperature Readings: Ensure the thermostat isn’t exposed to direct sunlight or drafts. Recalibrate the temperature sensor within the settings menu. Confirm proper wiring configuration for your heating/cooling system. If issues persist, a factory reset might resolve software glitches. Contact Honeywell support for further assistance if needed.
Thermostat Not Powering On
Initial Checks: First, confirm the circuit breaker controlling your HVAC system hasn’t tripped. A simple reset can often resolve power issues. Next, meticulously inspect all wiring connections at both the thermostat and your furnace or boiler. Loose connections are a common culprit.
Battery & C-Wire: If your model uses batteries, replace them with a fresh set. A frequently encountered problem is a missing or improperly connected C-wire (common wire). Verify its presence and secure connection. If a C-wire isn’t present, a C-wire adapter might be necessary. Contact a qualified HVAC technician if unsure.
Incorrect Temperature Readings
Location & Airflow: Ensure the thermostat isn’t directly exposed to sunlight, drafts, or heat-generating appliances. These factors significantly skew readings. Verify adequate airflow around the thermostat; obstructions can cause inaccurate temperature sensing. Consider relocating the thermostat if necessary.
Calibration & Sensor Issues: The Honeywell TH5220D1029 may have a calibration setting – consult the programming section to adjust. If readings remain consistently off, a faulty temperature sensor within the thermostat is a possibility. Contact Honeywell support or a qualified HVAC technician for sensor replacement or further diagnostics.
Resetting the Thermostat to Factory Defaults
Procedure: To restore your Honeywell TH5220D1029 to its original factory settings, simultaneously press and hold the ‘Menu’ and ‘Down’ buttons for approximately five seconds. The display will briefly flash and then revert to the initial setup screen, indicating a successful reset. This erases all personalized programming, schedules, and Wi-Fi connections.
Reasons for Reset: A factory reset is useful when troubleshooting persistent issues, preparing the thermostat for a new user, or completely reconfiguring your heating and cooling system. Remember that you’ll need to re-enter your preferences and schedule after performing this action.
Battery Replacement
Required Batteries: Your Honeywell TH5220D1029 utilizes two AA alkaline batteries as a backup power source, ensuring continued operation during power outages. A low battery indicator will appear on the display when replacement is needed – typically every 12-18 months, depending on usage.
Replacement Steps: Locate the battery compartment, usually on the side or back of the thermostat. Gently open the compartment and replace both batteries simultaneously with fresh AA alkalines, observing correct polarity (+ and -). Close the compartment securely. The display should confirm proper battery installation.
Advanced Settings & Features
Customization Options: The Honeywell TH5220D1029 offers several advanced settings to personalize your comfort. Explore features like swing adjustment, which controls the temperature range before switching between heating and cooling. Cycle rate settings allow fine-tuning of how frequently the system cycles on and off, optimizing efficiency.
Filter Change Reminders: Configure reminders to ensure timely filter replacements, maintaining air quality and system performance. Utilize the thermostat’s ability to learn your heating and cooling patterns for smarter scheduling. Access these features through the menu system, consulting the programming section for detailed instructions.
Understanding Error Codes
Decoding System Alerts: The Honeywell TH5220D1029 utilizes error codes to diagnose system issues. A flashing display indicates a problem requiring attention. Common codes include “E1” signaling a communication fault, often related to wiring or sensor connectivity. “E2” typically points to a heating system malfunction, while “E3” suggests a cooling system error.
Troubleshooting Guidance: Refer to the complete error code list within this manual for specific troubleshooting steps. Before contacting support, attempt basic fixes like checking wiring connections and ensuring proper power supply. Ignoring error codes can lead to system damage; prompt attention is crucial for maintaining optimal performance and preventing costly repairs.
Cleaning and Maintenance
Preserving Performance: Regular cleaning ensures optimal performance and longevity of your Honeywell TH5220D1029 thermostat. Disconnect power before cleaning. Use a soft, dry cloth to gently wipe the thermostat’s surface, avoiding abrasive cleaners or liquids. Do not immerse the unit in water.
Dust and Debris Removal: Periodically remove dust buildup around the vents to maintain accurate temperature sensing. Inspect wiring connections annually for corrosion or damage. Avoid spraying cleaners directly into the thermostat; instead, apply to the cloth. Proper maintenance prevents malfunctions and extends the lifespan of your heating and cooling system.
Warranty Information
Honeywell’s Commitment to Quality: Your Honeywell TH5220D1029 thermostat is covered by a one-year limited warranty against defects in materials and workmanship from the date of purchase. This warranty does not cover damage resulting from improper installation, misuse, abuse, or unauthorized modifications.
Warranty Coverage: To obtain warranty service, retain your proof of purchase and contact Honeywell Support. Honeywell, at its option, will repair or replace the defective product. This warranty provides exclusive remedies; Honeywell is not liable for incidental or consequential damages. See the full warranty details included with your product or online at HoneywellHome.com.
Contacting Honeywell Support
Need Assistance? Honeywell offers multiple channels for support regarding your TH5220D1029 thermostat. For quick answers to common questions, visit the Honeywell Home support website at HoneywellHome.com. There, you’ll find FAQs, troubleshooting guides, and downloadable resources.
Direct Support: You can also reach Honeywell Support directly by phone at 1-800-468-1513. Their knowledgeable representatives are available to assist with installation issues, programming questions, and warranty claims. Ensure you have your model number and date of purchase ready when contacting support for faster service. Online chat support may also be available through the website.
Frequently Asked Questions (FAQ)
Q: My thermostat isn’t turning on. Check the batteries or breaker. Q: Can I use this with a heat pump? Yes, but verify compatibility with your system. Q: How do I reset the thermostat? Refer to the “Resetting to Factory Defaults” section. Q: What do the error codes mean? See the “Understanding Error Codes” section for details.
Q: Can I control this remotely? With a compatible Honeywell Home account and hub. Q: Is professional installation required? No, but recommended if you’re uncomfortable with electrical wiring. Q: How often should I replace the batteries? Typically every 6-12 months, depending on usage.
Regulatory Compliance Information
This Honeywell TH5220D1029 thermostat complies with FCC Part 15 regulations. Operation is subject to two conditions: it must not cause harmful interference, and it must accept any interference received. Changes or modifications not expressly approved by Honeywell could void warranty and compliance.
This device adheres to industry standards for electromagnetic compatibility (EMC). It’s designed to minimize radio frequency interference with other devices. Disposal of this product should follow local electronic waste regulations. Do not dispose of with general household waste. Refer to Honeywell’s website for detailed compliance statements and documentation.