Watercolor Painting Techniques
Watercolor painting is a versatile and rewarding art form. With the right techniques and materials, you can create stunning works of art. This guide provides a comprehensive overview of watercolor techniques, from basic to advanced, covering everything from wet-on-dry to glazing and salt techniques. You will also find resources for learning more about color mixing, composition, and creating unique textures.
Introduction
Watercolor painting is a captivating art form that has captivated artists for centuries. Its unique qualities, including transparency, fluidity, and vibrant colors, offer endless possibilities for creative expression. This comprehensive guide delves into the world of watercolor painting, providing a wealth of information for both beginners and seasoned artists. Whether you’re seeking to master the fundamentals or explore advanced techniques, this guide will empower you to unleash your artistic potential.
From the basic principles of color mixing and brushwork to the intricacies of composition and perspective, each section offers a clear and concise explanation. Explore the different tools and materials used in watercolor painting, including paints, brushes, paper, and masking fluids. Discover the secrets behind creating captivating textures and effects, and learn how to effectively utilize color theory to achieve your desired aesthetic.
This guide serves as a valuable resource for anyone seeking to learn or refine their watercolor painting skills. With its insightful explanations, practical exercises, and inspiring examples, it will guide you on your journey to becoming a more skilled and confident watercolor artist. Embrace the magic of watercolor and let your creativity soar!
Materials
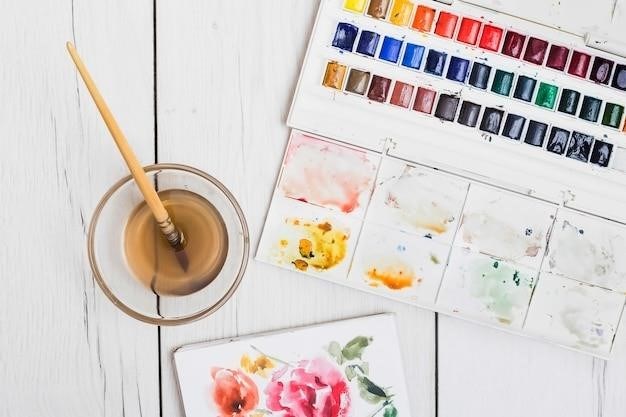
The right materials are crucial for a successful watercolor painting experience. You’ll need a few essential items to get started, and as you progress, you may want to expand your collection. A good watercolor paint set is a must-have. Look for a set with a variety of colors, including primary colors (red, yellow, blue), secondary colors (green, orange, purple), and tertiary colors. Watercolor paints come in tubes or pans, with pans being more convenient for travel.
Brushes are another essential element. Choose brushes with different shapes and sizes to suit your painting style and needs. Round brushes are versatile and ideal for detailed work, while flat brushes are great for covering large areas. A selection of brushes in various sizes will allow you to create a wide range of strokes and effects.
Watercolor paper is specifically designed to withstand the moisture of watercolors. It comes in different weights and textures, each offering unique characteristics. Heavier weight paper is more durable and less prone to buckling, while textured paper adds visual interest to your paintings. You’ll also need a few cups for water, paper towels for cleaning up, and masking fluid for protecting specific areas of your painting from the wash.
Basic Watercolor Techniques
Mastering basic watercolor techniques is key to unlocking the full potential of this versatile medium. These techniques form the foundation for creating a wide range of effects and styles. Understanding how water interacts with the paint is crucial. Watercolor paints are translucent, meaning they allow light to pass through them, creating a luminous and ethereal quality. This quality is what makes watercolor painting so unique and captivating.
The amount of water used in your paint will determine the intensity and transparency of the color. More water creates a lighter, more transparent wash, while less water results in a stronger, more opaque color. These techniques are your starting point for creating beautiful watercolor paintings, and with practice, you’ll develop your own style and mastery of this captivating art form.
Wet-on-Dry Technique
The wet-on-dry technique is a fundamental watercolor technique that involves applying wet paint to a dry surface. This method is often used for beginners as it provides more control over the paint and allows for precise brushstrokes. The wet-on-dry technique is ideal for creating crisp edges, defined shapes, and detailed elements in your paintings. It’s a versatile technique that allows for layering and building up color intensity.
When applying wet paint to a dry surface, the paint dries quickly, creating distinct edges and sharp lines; This makes it perfect for depicting objects with clear outlines, such as leaves, flowers, or buildings. As the paint dries, it creates a soft, velvety texture, adding depth and dimension to your artwork. The wet-on-dry technique is a cornerstone of watercolor painting and a great starting point for mastering this beautiful medium.
Wet-on-Wet Technique
The wet-on-wet technique is a captivating approach to watercolor painting that involves applying wet paint to a wet surface. This technique allows for a unique blend of colors, creating soft transitions and ethereal effects. It’s ideal for capturing the fluidity and movement of water, clouds, or landscapes. The wet-on-wet technique is all about letting the paint flow and blend naturally. The water in the paint and on the paper creates a soft, diffused effect, making it difficult to control precise edges and shapes.
Instead of sharp lines, the wet-on-wet technique creates a sense of ethereal beauty. The colors blend seamlessly, creating a dreamy and atmospheric quality. This technique is especially effective for capturing the softness of clouds, the reflections in water, or the hazy atmosphere of a distant landscape. It allows for spontaneous and expressive marks, giving your artwork a sense of life and energy.
Layering
Layering is a fundamental watercolor technique that involves applying multiple washes of paint, one on top of the other, to create depth, dimension, and rich color variations. This technique allows for a gradual build-up of color and creates a sense of depth and luminosity. Each layer of paint interacts with the previous layer, creating subtle changes in hue and value. The wet-on-dry technique, where paint is applied to a dry surface, is often used in layering.
Layering is a versatile technique that can be used to create a range of effects, from soft gradients to bold contrasts. It allows for the exploration of color relationships, creating harmonious or contrasting color palettes. It also offers opportunities for experimentation, allowing you to create unique and unexpected effects. The key to successful layering is to allow each layer to dry completely before applying the next. This ensures that the layers blend seamlessly, creating a smooth and even finish.
Blending
Blending in watercolor painting is the art of seamlessly merging two or more colors together, creating smooth transitions and soft edges. It’s a technique that adds depth, dimension, and a sense of realism to your paintings. It’s often used to create gradients, skies, and other natural elements, where colors naturally flow into one another. Blending is achieved by applying wet paint to wet paint, allowing the colors to naturally mix on the paper.
The key to successful blending is to use a light touch and to work quickly, as watercolor paint dries quickly. If the paint starts to dry before you can blend it, you can use a damp brush to rewet the area. Blending can be achieved with a variety of brushstrokes, from circular motions to back-and-forth strokes. Experiment with different techniques to find what works best for you. The blending technique can be combined with other watercolor techniques, such as layering, to create even more complex and interesting effects.
Glazing
Glazing is a watercolor technique that involves applying thin, transparent layers of paint over a dried layer of paint. It’s like painting with a veil of color, allowing the underlying layers to show through. Glazing is a powerful technique for creating depth, luminosity, and subtle color variations. It’s particularly useful for creating skies, water, and other atmospheric effects.
Glazing can be used to create a variety of effects, including adding warmth, coolness, or depth to a painting. It can also be used to create a sense of distance or to soften edges. To glaze effectively, you’ll need to use very dilute washes of paint, ensuring that each layer dries completely before you apply the next. This allows the layers to blend seamlessly and create a luminous effect. The key to successful glazing is to use a light touch and to build up the layers gradually.
Salt Technique
The salt technique is a fun and easy way to add texture and interest to your watercolor paintings. It works by sprinkling salt onto a wet wash of paint. As the paint dries, the salt crystals absorb the moisture, creating interesting patterns and textures. The salt can be left on the paper to create a rough, grainy texture, or it can be brushed off once the paint is dry to reveal a more subtle effect. The salt technique is particularly effective for creating clouds, snow, or other natural textures.
The salt technique is a great way to add a unique touch to your watercolor paintings. It’s easy to use and can be incorporated into a variety of subjects. To use the salt technique, simply sprinkle a small amount of salt onto a wet wash of paint. Allow the paint to dry completely, then brush off the salt crystals. The salt will leave behind a textured surface that will add a unique dimension to your artwork.
Masking Fluid
Masking fluid is a liquid that can be applied to watercolor paper to protect certain areas from paint; It’s a great tool for creating sharp edges, reserving white areas, or creating intricate details. Masking fluid is available in both liquid and pen form. The liquid form can be applied with a brush or a sponge, while the pen form is ideal for creating fine lines and details. Once the masking fluid is dry, you can apply paint over it. After the paint has dried, you can peel off the masking fluid to reveal the protected areas. It’s essential to allow the masking fluid to dry completely before applying paint, otherwise, it could bleed or smudge.
Masking fluid can be used to create a variety of effects. You can use it to create crisp edges for clouds, buildings, or leaves. You can also use it to reserve white areas for highlights or lettering. Or, you can use it to create intricate details like flowers, patterns, or textures. Experiment with masking fluid to see what effects you can create!
Splattering
Splattering is a fun and expressive watercolor technique that can add texture and movement to your paintings. It involves creating random dots and splashes of paint by flicking or tapping your brush against the paper. You can use a variety of tools for splatter, including a toothbrush, a straw, or even your fingers. To create a splatter effect, load your brush with a diluted watercolor paint and hold it over your paper. Then, tap or flick the brush against the paper to create the desired splatter effect. You can control the size of the splatter by adjusting the amount of paint on your brush and the force with which you tap or flick it.
Splattering is great for adding texture to backgrounds, creating rain effects, or adding a sense of movement to your paintings. It’s also a fun way to experiment with different colors and patterns. Try experimenting with different splatter techniques to see what effects you can create. You can use a toothbrush to create fine splatters, a straw to create larger splatters, or your fingers to create a more organic splatter effect.

Color Mixing and Theory
Understanding color mixing and theory is essential for creating harmonious and vibrant watercolor paintings. Watercolor paints are transparent, meaning that the color of the paper shows through the paint. This allows you to create subtle blends and washes of color. The primary colors, red, yellow, and blue, can be mixed to create a wide range of secondary and tertiary colors. Experiment with different color combinations to discover your own unique palette.
Consider the color wheel when mixing your colors. Colors that are opposite each other on the color wheel are complementary colors, and they create a strong contrast. Colors that are next to each other on the color wheel are analogous colors, and they create a harmonious blend. Use color temperature to create depth and dimension in your paintings. Warm colors, like reds and yellows, tend to advance, while cool colors, like blues and greens, tend to recede.